biomodal duet software installation and running: Quick Start Guide#
This quick start guide gives a concise overview of how to use our duet software installation and running guide: download, install and run the biomodal command line interface (CLI) for processing biomodal data.
Already installed?
If you’ve already installed the biomodal CLI and used it to run the duet pipeline, and now want help understanding the outputs of the pipeline, check out our Data Interpretation Guide.
Who Is This For?#
This guide is for systems administrators and users who want to install and run the biomodal CLI tools.
🧑💻 Bioinformatician: You want to install the software for your own use on your workstation, compute cluster, or cloud environment.
🖥 Systems administrators: You want to install the software on a cluster for several users to run on their own data.
Overview: the duet Pipeline and CLI#
The structure of the biomodal duet pipeline and biomodal CLI is shown in this diagram:
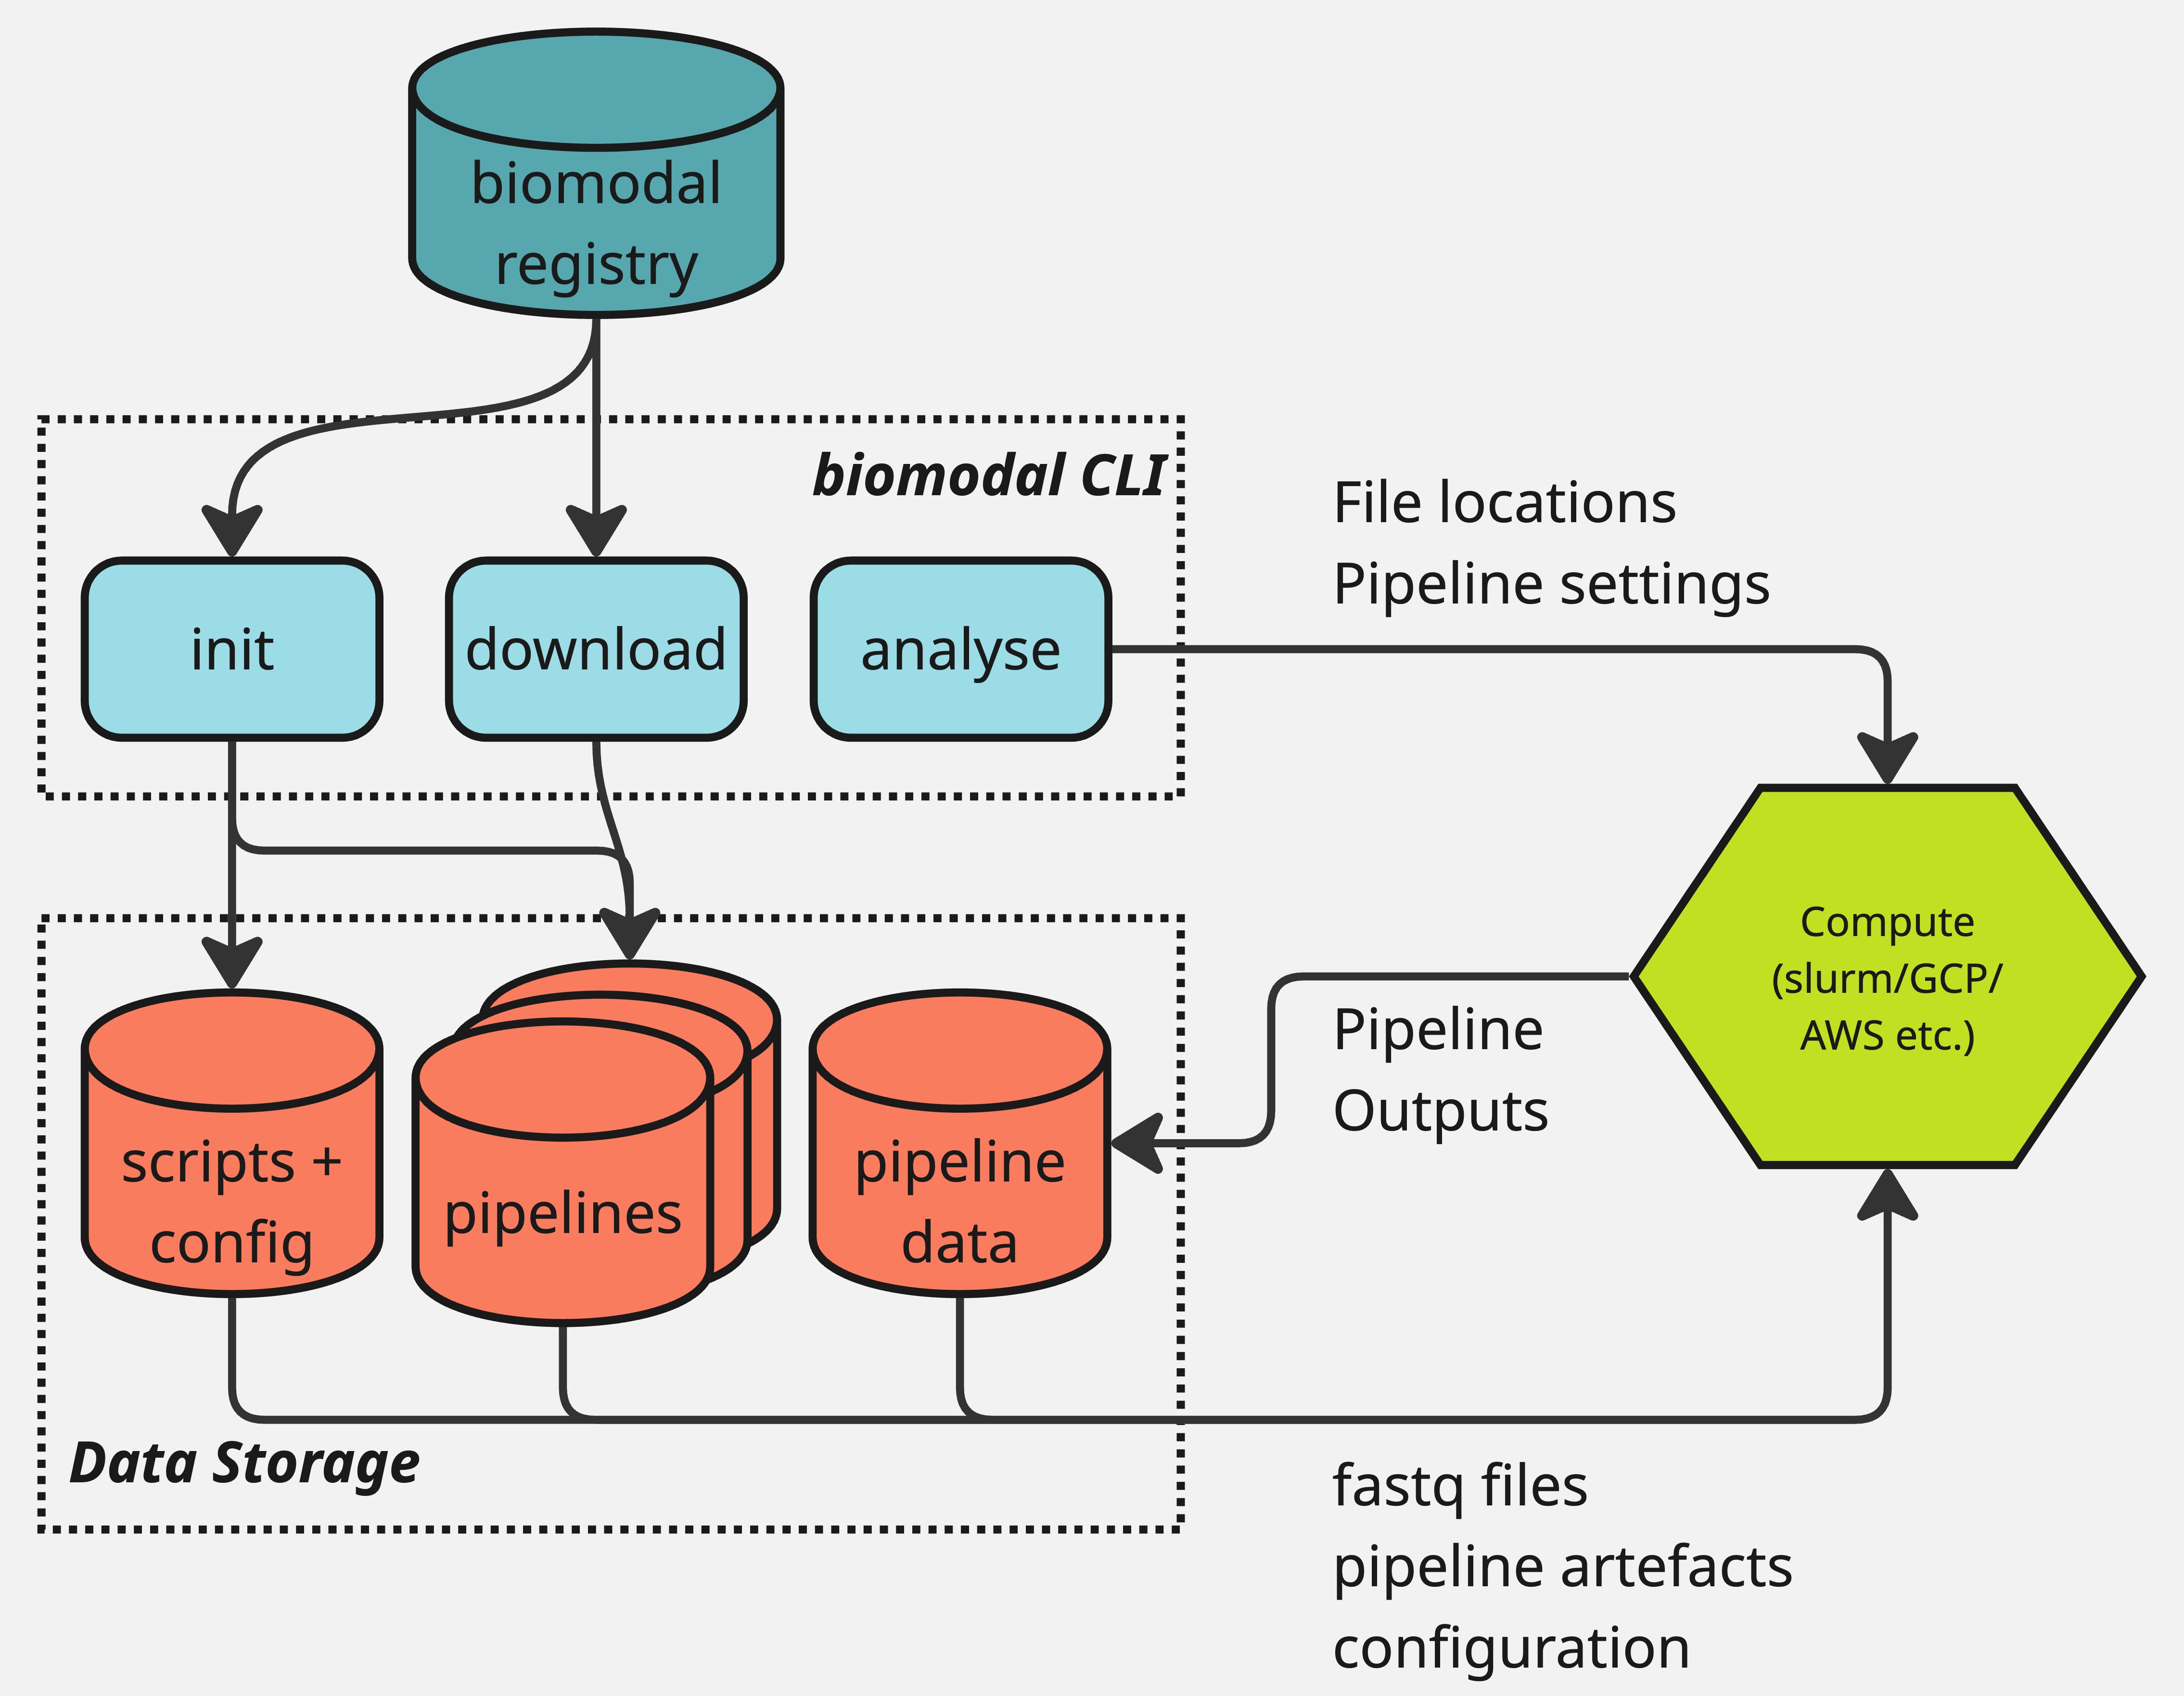
The typical user flow for the duet pipeline is as follows:
Download and install the biomodal CLI.
Define your instance location by setting the
BIOMODAL_INSTANCE_DIRECTORYenvironment variable.Run
biomodal initto set up the necessary configuration files.This will automatically download the latest version of the duet pipeline software.
Run
biomodal run duet --testto make sure your system is properly configured.Includes downloading a small test dataset and running the duet pipeline on it.
Run
biomodal run duetwith the proper settings to run the pipeline on your data.Based on this example.
Read and interpret the results.
Further guidance on interpreting the outputs from the pipeline can be found in the data interpretation guide.
Forgotten Passwords
In the event of a lost or forgotten password, click here to reset it.
Other Capabilities#
You can download new versions of the duet pipeline software by running
biomodal download.You can maintain multiple versions of the duet pipeline software on your system and choose to analyse with whichever you choose.
The biomodal CLI also allows you perform other tasks, including:
Gathering relevant support information about your system with
biomodal get diagnostics.Generating support for a new reference genome with the reference genome pipeline.
How to use this guide#
Support links#
For any questions or issues, please contact your biomodal support team at support@biomodal.com.
User documentation contents#
Release Notes#
Links to release notes for pipeline and biomodal CLI versions are linked below.
Release version |
Date |
|---|---|
December 2025 |